 Farm
Beds Farm
Beds
How does the saying go?....Making your bed and lying in it. What about....Making
your bed and growing in it.
Farm beds are essential for successful farming, at least in my opinion. Many
people say making beds is not really necessary so basically it depends on what
works for you.
A farm bed is a raised area of soil, often used to grow the same thing. Farm
beds are also used to separate things which should not be grown together. There
are many benefits to using farm beds including, easier access, easier harvesting,
better weed control, good drainage, and aesthetics. From straight line beds, to
rectangles and squares, to free form designs, the choice is really up to you.
Keep experimenting until you find a design that is both functional and
aesthetically pleasing. |
|
|
 Straight
Line Beds Straight
Line Beds
After moving to Tanegashima island, I began farming. Although I had been
gardening for many years, this was the first time to be growing stuff on this
much land. I looked around at many other farms on the island and saw that almost
all the farmers were using straight line beds. I thought it was a good idea to
do the same. We moved to the island just in time to put in cool season veggies
and some herbs. I made long straight line beds and put in daikon (white radish)
in several beds. A few weeks later, a typhoon came and wiped out almost all of
the poor defenseless radish seedlings. And then a week later another typhoon hit
the island and finished the job. Well okay, these were typhoons, and I decided I
was not totally to blame for this farming fiasco. Still I wondered what went
wrong. |
 I
realized straight line beds were ineffective in a non-mechanized
farm. Long narrow beds were tiring to make, difficult to maintain, and
relatively impossible to mulch, especially in a rainy and windy climate such as Tanegashima Island. The mulch would easily get washed or blown off. These beds
also provided very little wind protection. We get typhoons during the Summer and
strong winds throughout the year. Seedlings and delicate veggies get little
protection on straight line beds. I began using these beds at the beginning and
quickly switched to square and rectangular beds . I do still use straight line
beds for root crops such as sweet potatoes, which produce strong vines and
leaves, and are
able to handle the weather on this island. I
realized straight line beds were ineffective in a non-mechanized
farm. Long narrow beds were tiring to make, difficult to maintain, and
relatively impossible to mulch, especially in a rainy and windy climate such as Tanegashima Island. The mulch would easily get washed or blown off. These beds
also provided very little wind protection. We get typhoons during the Summer and
strong winds throughout the year. Seedlings and delicate veggies get little
protection on straight line beds. I began using these beds at the beginning and
quickly switched to square and rectangular beds . I do still use straight line
beds for root crops such as sweet potatoes, which produce strong vines and
leaves, and are
able to handle the weather on this island.
The following is the way I used to make conventional straight line beds for
those of you who are interested. |
 Making
Straight Line Beds Making
Straight Line Beds
Hey if you own a tractor or a rototiller then this is a relatively easy process.
If you are planning to do this with hand tools, prepare yourself for a bit of
work. Keep in mind that when you harvest your veggies from straight line beds,
the beds are destroyed and need to be built back up again. The main reason why I
prefer square and rectangular beds. Although for really strong root veggies like
sweet potatoes, straight line beds are still the best choice. The following is
the method I used to make these beds.
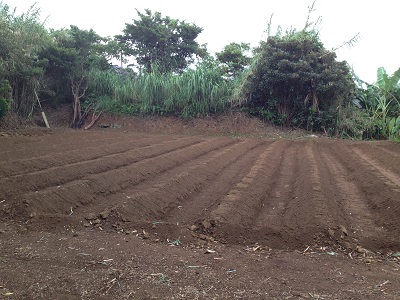
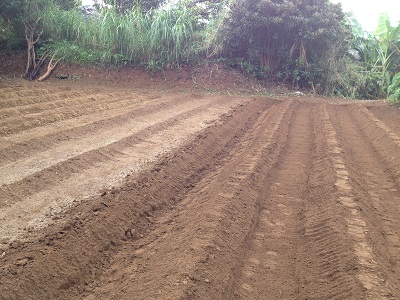
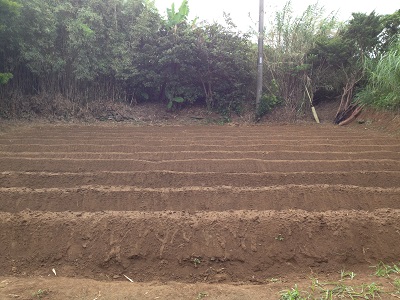
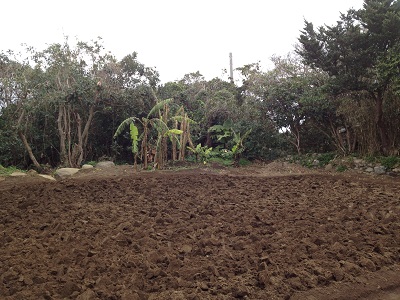
Begin by tilling the soil to loosen it up and make it easier to "hill up" the
beds. The farm in the picture was tilled and is all smoothed out and ready for
bed making. |
 Building
Bed Height Building
Bed Height
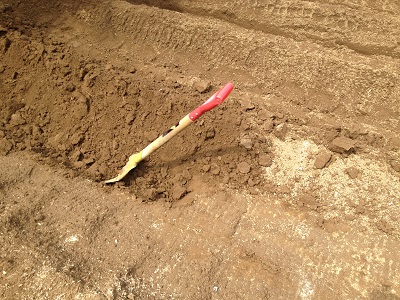
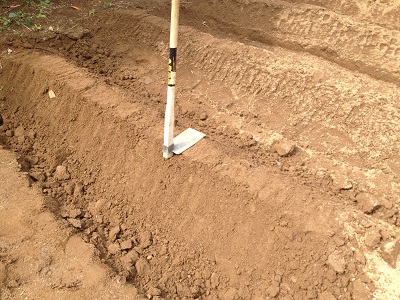
Building the height of the bed is probably the most difficult task. Using a
shovel, pick up soil from both sides of the center of the bed and deposit it on
the top. Doing this keeps things symmetrical which is especially important since
the shoveled out areas will become the future drains.
No need to worry if things look messy during this phase of bed making.
Subsequent steps will make things pretty again. |
 Smoothing
Sides Smoothing
Sides
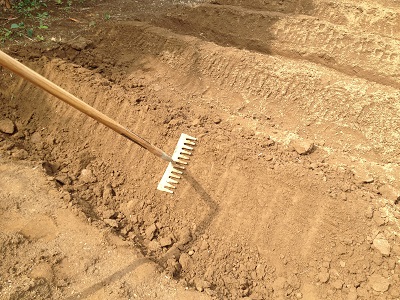
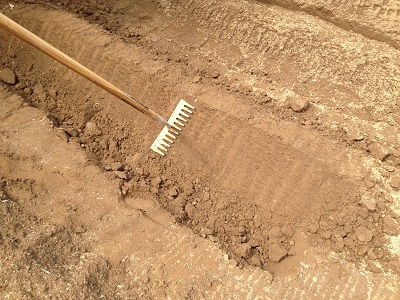
Use a rake to pack in and smooth out the sides of each bed. This step is
really not necessary unless you are in a climate that has a lot of rain.
Tanegashima island receives a ton of rain during the Summer monsoon season (tsuyu
in Japanese) which typically arrives at the island in June and July. The better
the sides of the beds are packed, the less chance the bed will be eroded away
once the rains come. This is much less of a problem once you ihave something
growing in the beds, since the leaves will channel the rain away from the beds
and into the drains. |
 Smoothing
Tops Smoothing
Tops
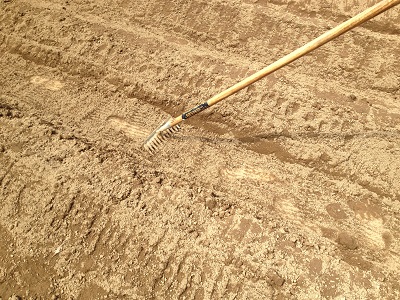
Use a hoe to pack in and smooth out the tops of each bed. Again, this is the
best way to offset erosion from a heavy rain event. The smoothed out tops also
make it much easier for sowing seeds or seedings. |
 Smoothing
Sides Again Smoothing
Sides Again
Use a rake once again to pack in and smooth out the sides from all of
the dirt which fell off the top during the previous step. Okay this might seem a
bit anal, or maybe a lot, but it worked for me. |
 Smoothing
Drains Smoothing
Drains
Use a rake to smooth out the drains which were automatically created
when the beds were made. Again, maybe overdoing it a bit, but this reduces the
amount of loose dirt in the drains which will impede the flow of excess runoff
from the rain. This also makes it easer to walk and makes the farm prettier
overall. |
|
 Square
and Rectangular Beds Square
and Rectangular Beds
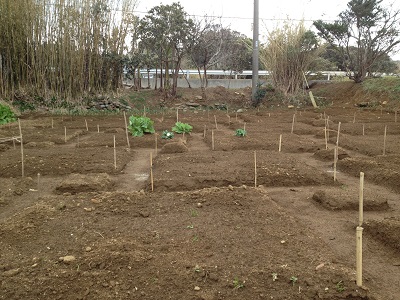
These are rarely used by conventional farmers due to
the lack of accessibility of tractors and other farm machines. In addition,
sowing and harvesting are much more time consuming. These beds are great,
however, for the non-mechanized farm. I decided on this type of bed for my farms
many years ago. Specifically, I use rectangular beds measuring one meter in
width. At the beginning, when I using only hand tools, I preferred beds
measuring one meter on each side. After injuring both shoulders, I purchased a
rototiller and now my beds are up to 20 meters long, but still only one meter
wide. These beds are pretty easy when it comes to sowing, cultivating, and
harvesting, and this is a much better way to protect your crops from wind
damage.
After the infamous
straight line bed (read above)
fiasco, I realized a change was needed if I wanted to produce anything in this
very difficult climate. Way back in the day, when I was gardening, I was limited
by small spaces. I used small rectangular beds and I remember it worked pretty
well. I decided to use this approach with the new larger scale farming I was doing. I
did a bit of research and found information about "square foot gardening", a
term coined by Mel Bartholomew in his 1981 book of the same name. I experimented
each season with different designs and eventually realized simple was the best.
With the exception of sweet potatoes (still using straight line beds for those),
I am now using all rectangular beds in my farms. The beds are all one meter
(about three feet) wide and vary in length from two, to over twenty meters. The
great thing about this design is the ease of working on the beds. Working from
either side, everything is within a half a meter reach. Easy to sow seeds and
seedling, easy to weed and mulch, and easy to harvest. Straight line beds are
destroyed once the veggies are harvested while rectangular beds stay the same
and only need to be smoothed out the next season.
In addition, rectangular beds provide better wind and erosion protection than
straight line beds. They also facilitate "canopy farming", a term I coined after
experimenting and realizing some things, like sweet basil, actually grew better
all jammed in together. |
 Making
Square and Rectangular Beds Making
Square and Rectangular Beds
Begin by tilling the soil. Any larger chunks should be smashed and made small
enough to be raked into a small hill with out rolling back to the bottom. Smooth
out the area as much as possible and decide the location and size of your beds. |
 Make
an Outline Make
an Outline
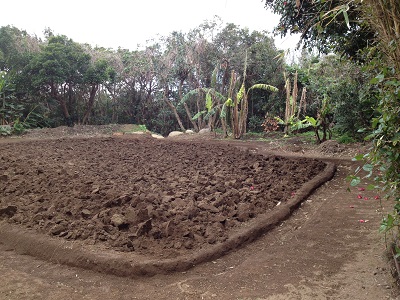
Next make an outline of the entire farm area by hilling up the perimeter to the
same height you plan to make all your beds. Know the outside boundaries of the
area you plan to use makes it much easier to measure and make the individual
beds. |
 Form
the Beds Form
the Beds
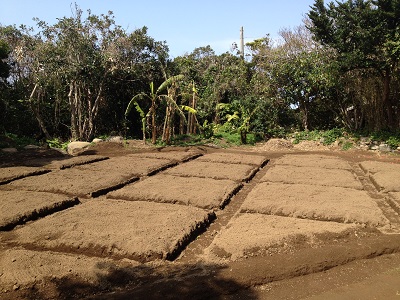
This was one of the first attempts at square bed farming and it worked out
great. The only problem was the beds were made as two meter by two meter
squares, too wide to be able to easily reach the middle of the beds. This meant
occasionally stepping on the beds....unacceptable. Next season I began using
beds that were only one meter wide. |
 Another
Example Another
Example
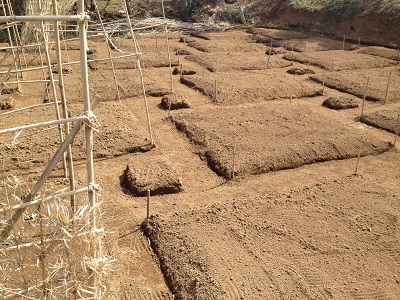
This was one of the craziest designs ever but it worked out pretty well. The
square beds were offset to provide better wind protection. The small squares
were used for wild turmeric and put there more for aesthetics than anything
else. The posts to the side are actually pieces of bamboo, which were growing
wild at the farm, used to make a very sturdy trellis over some of the beds for
vine veggies. The bamboo was tied with jute. |
|
 Free
Form Beds Free
Form Beds
Free Form beds are exactly what they sound
like....um....free form. These beds can be anything you want
them to be. Many times a park or other public place will use
flowers or bushes to spell out words or to make specific
designs. These would be examples of free form beds. Japanese
seem to be very fond of doing this.
Making free form beds is very time consuming but a lot of fun nonetheless.
Nothing works better to get the attention of the local farming community than
free form beds. Yup, expect plenty of questions and comments.
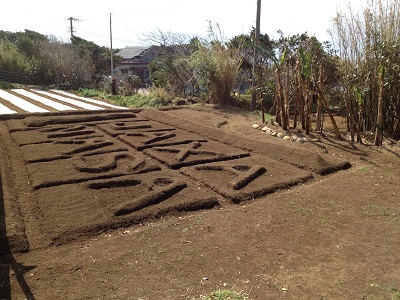
Tanegashima island is home to the Tanegashima Space Center
where the Japan Aerospace Exploration Agency launches their rockets. Many times
JAXA and NASA work together on projects. We watched many rocket launches in the
first couple of years on the island and it was impressive to say the least. This
inspired me to turn our upper farm into a kind of tribute to the two space
agencies. I grew carrots on the raised letters and the rocket, the phallic
looking section next to the "J" in JAXA and the "N" in NASA. |
 Bed
Preparation Bed
Preparation
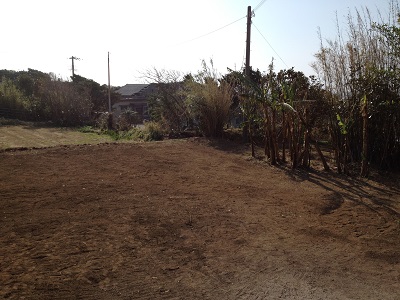
As with straight line beds, and square and rectangular beds, the soil needs to
be tilled and smoothed out before beginning. |
 Great
Location Great
Location
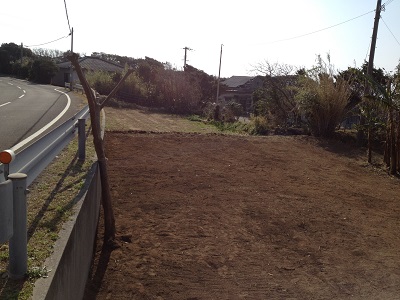
This farm was adjacent to one of the busiest roads on the island and got a lot
of attention from the locals, in fact, some folks actually took pictures of the
design in the top picture. |
|
|